Manage different features of dashboard associated with your TimeCaptis account anytime. You can view the information like today's event, time tracking statistics for the past 30 days, teams information, recent to-dos, contacts and notes. Refer to the detailed instructions in the step by step guide below.
1. Sign in to your TimeCaptis Account
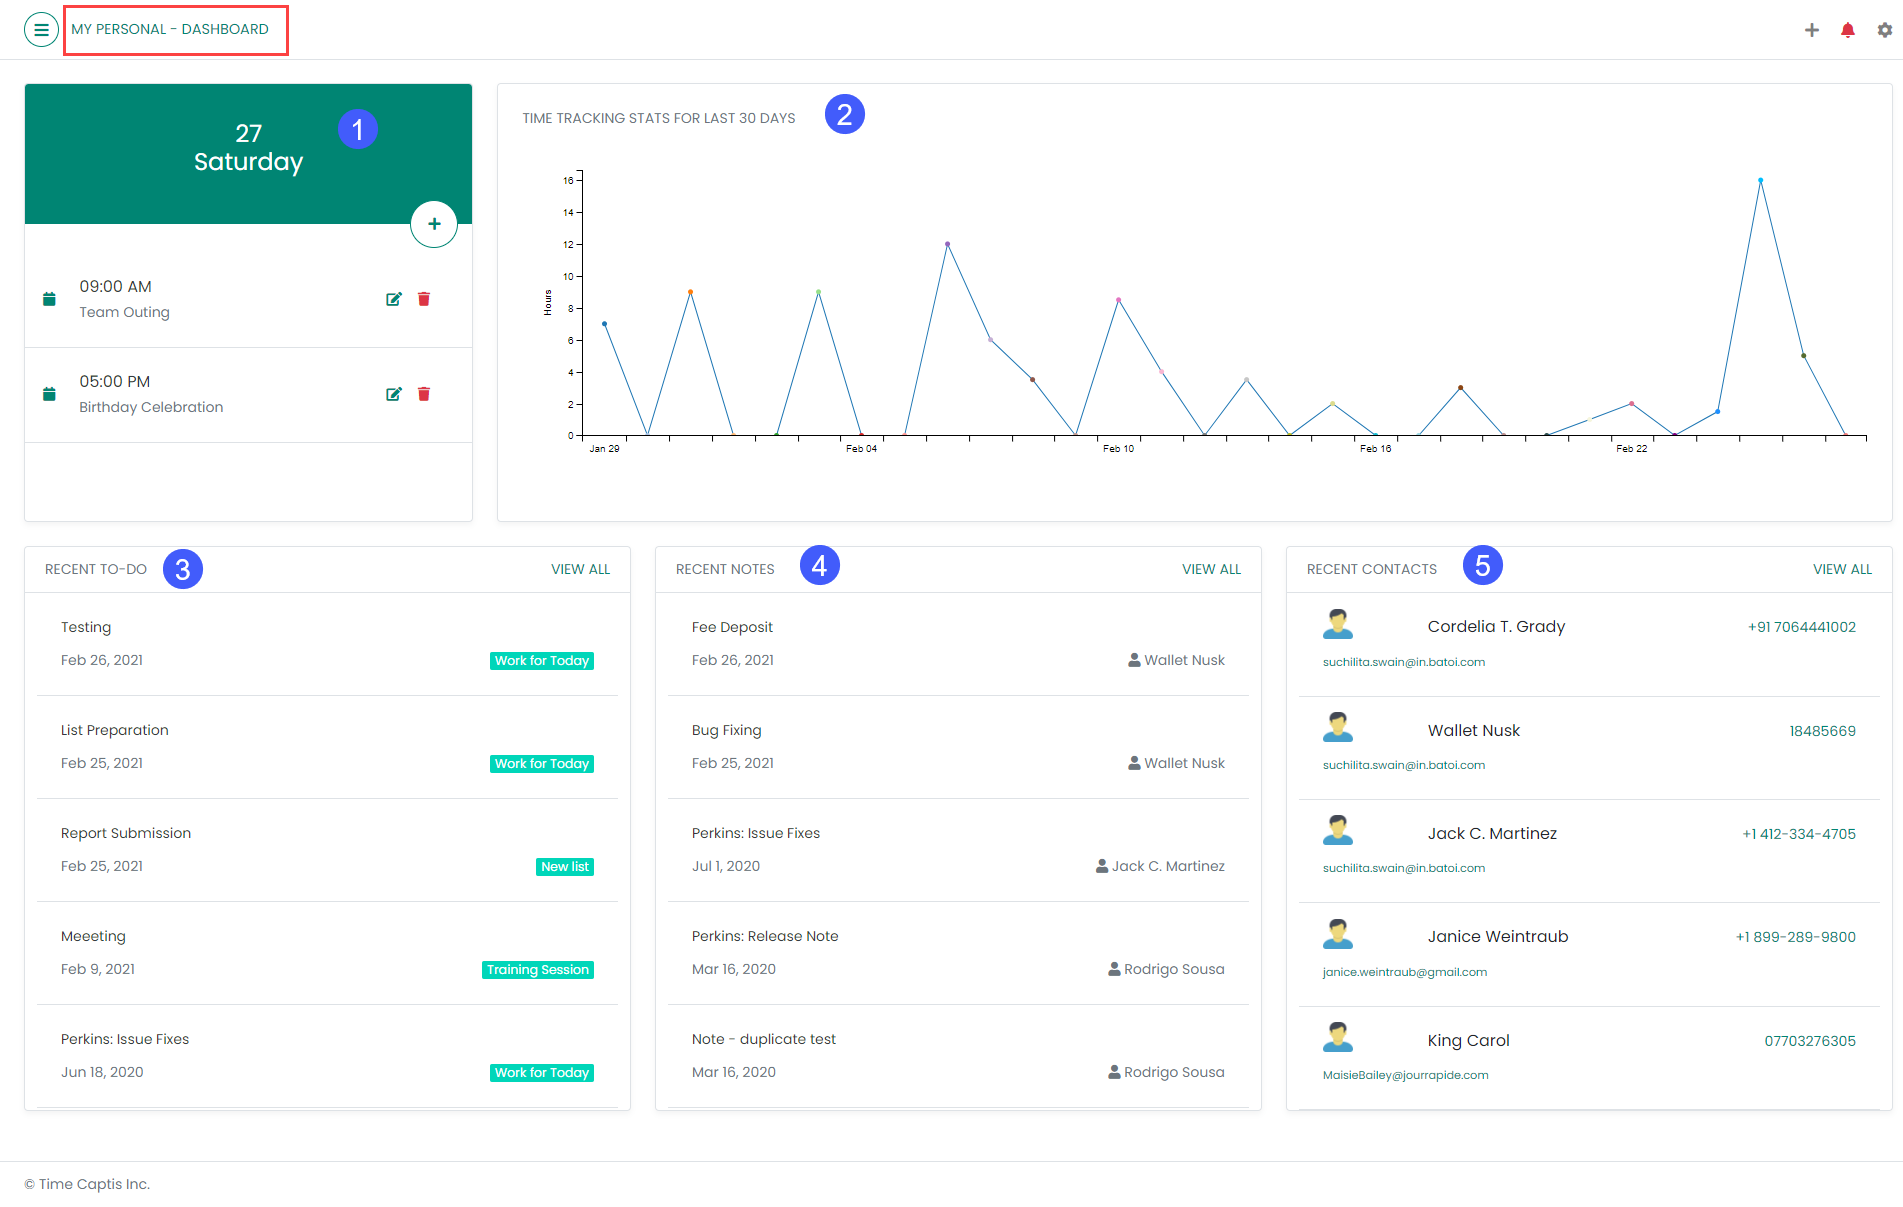
2. After signing in into your account, the ‘Dashboard’ page of the 'My Personal' team will appear as shown in Figure 1. Each step shown in Figure 1 is explained in the below table. There will be dashboard for each Team to which you are associated, which you can access from the left sidebar menu.
Figure 1
Sl. No.
Name
Description
1
Today's Event Widget
The events having the current date as the event date for the selected team will auto-populate here
2
Time Tracking Graph
The total time given by a subscriber for to-dos, notes, contacts and events for the selected team will appear in the graph on a daily basis for the last 30 days
3
Recent To-Do Widget
The recent to-dos of a subscriber upto 5 for the selected team will auto-populate here
4
Recent Notes Widget
The recent notes of a subscriber upto 5 for the selected team will auto-populate here
5
Recent Contacts Widget
The recent contacts of a subscriber upto 5 for the selected team will auto-populate here
3. To Add an Event from the Dashboard, click on the ‘+’ button appearing in the 'Today's Event' widget as shown in Figure 2. Upon doing so, the 'Add Event' page will appear. Adding an Event has already been discussed in the 'Calendar' module.
Figure 2
4. To view a particular Event from the Dashboard, click on that Event appearing in the 'Today's Event' widget as shown in Figure 3. Managing an Event in the 'View Event' page has already been discussed in the 'Calendar' module.
Figure 3
5. To edit a particular Event from the Dashboard, click on the 'Edit Event' button appearing against the Event in the 'Today's Event' widget as shown in Figure 4. Editing an Event has already been discussed in the 'Calendar' module.
Figure 4
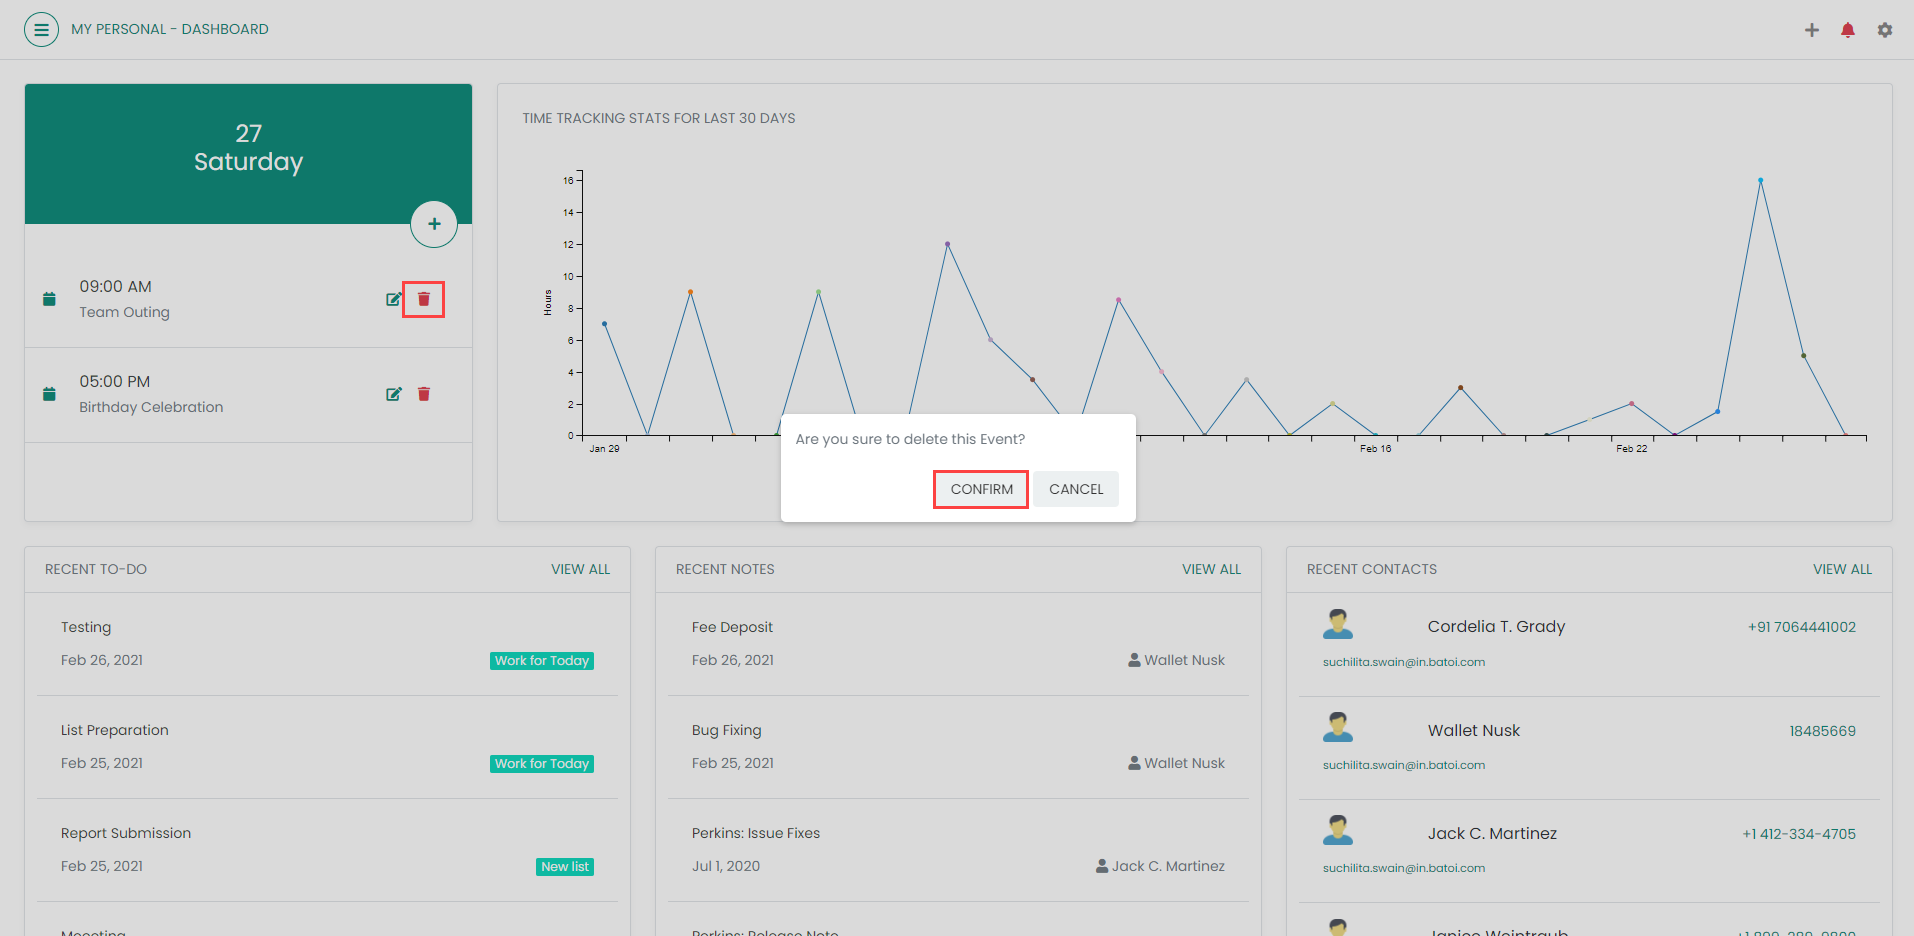
6. To delete a particular Event from the Dashboard, click on the 'Delete Event' button appearing against the Event in the 'Today's Event' widget as shown in Figure 5.
Figure 5
7. Upon doing so, you shall see a pop-up window to confirm before deletion. Click on the 'Confirm' button as shown in Figure 6 and the said Event will be deleted.
Figure 6
8. To view a particular To-Do from the Dashboard, click on that To-Do appearing in the 'Recent To-Do' widget as shown in Figure 7. Upon doing so, the view page of that particular To-Do Item will appear. Managing a To-Do Item has already been discussed in the 'To-do' module.
Figure 7
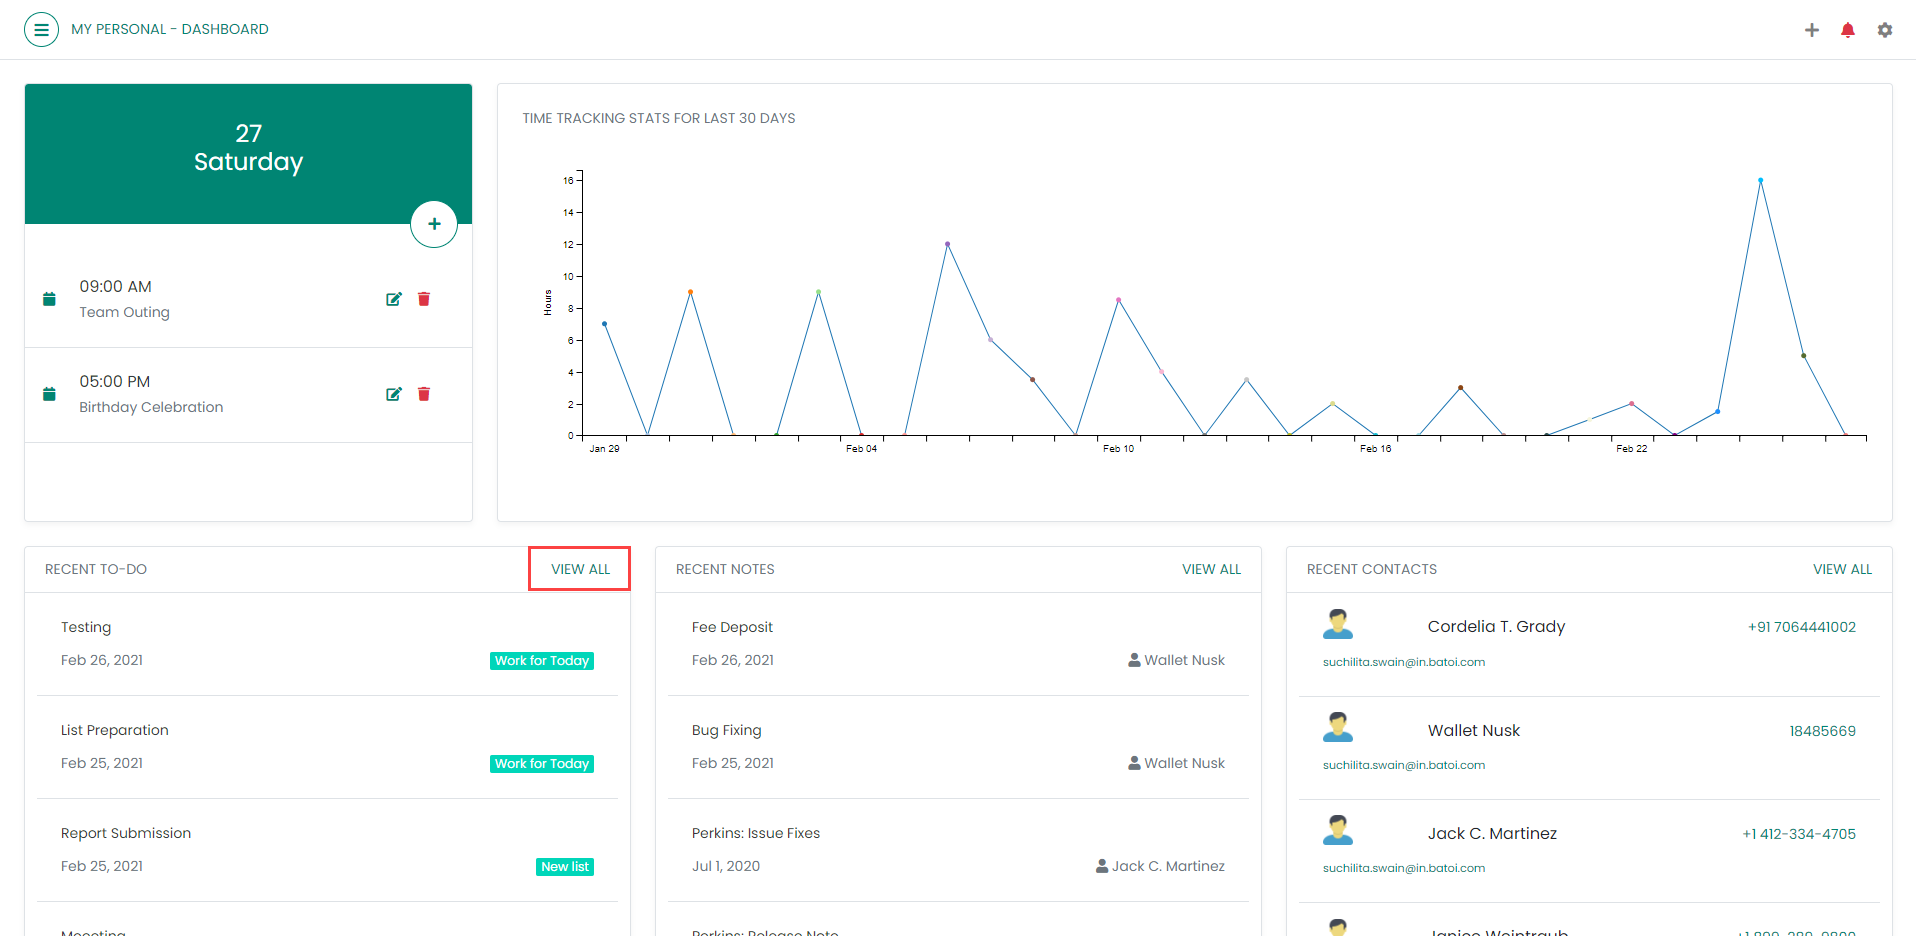
9. To view all the added To-Do Items, click on the 'View All' button appearing in the 'Recent To-Do' widget as shown in Figure 8.
Figure 8
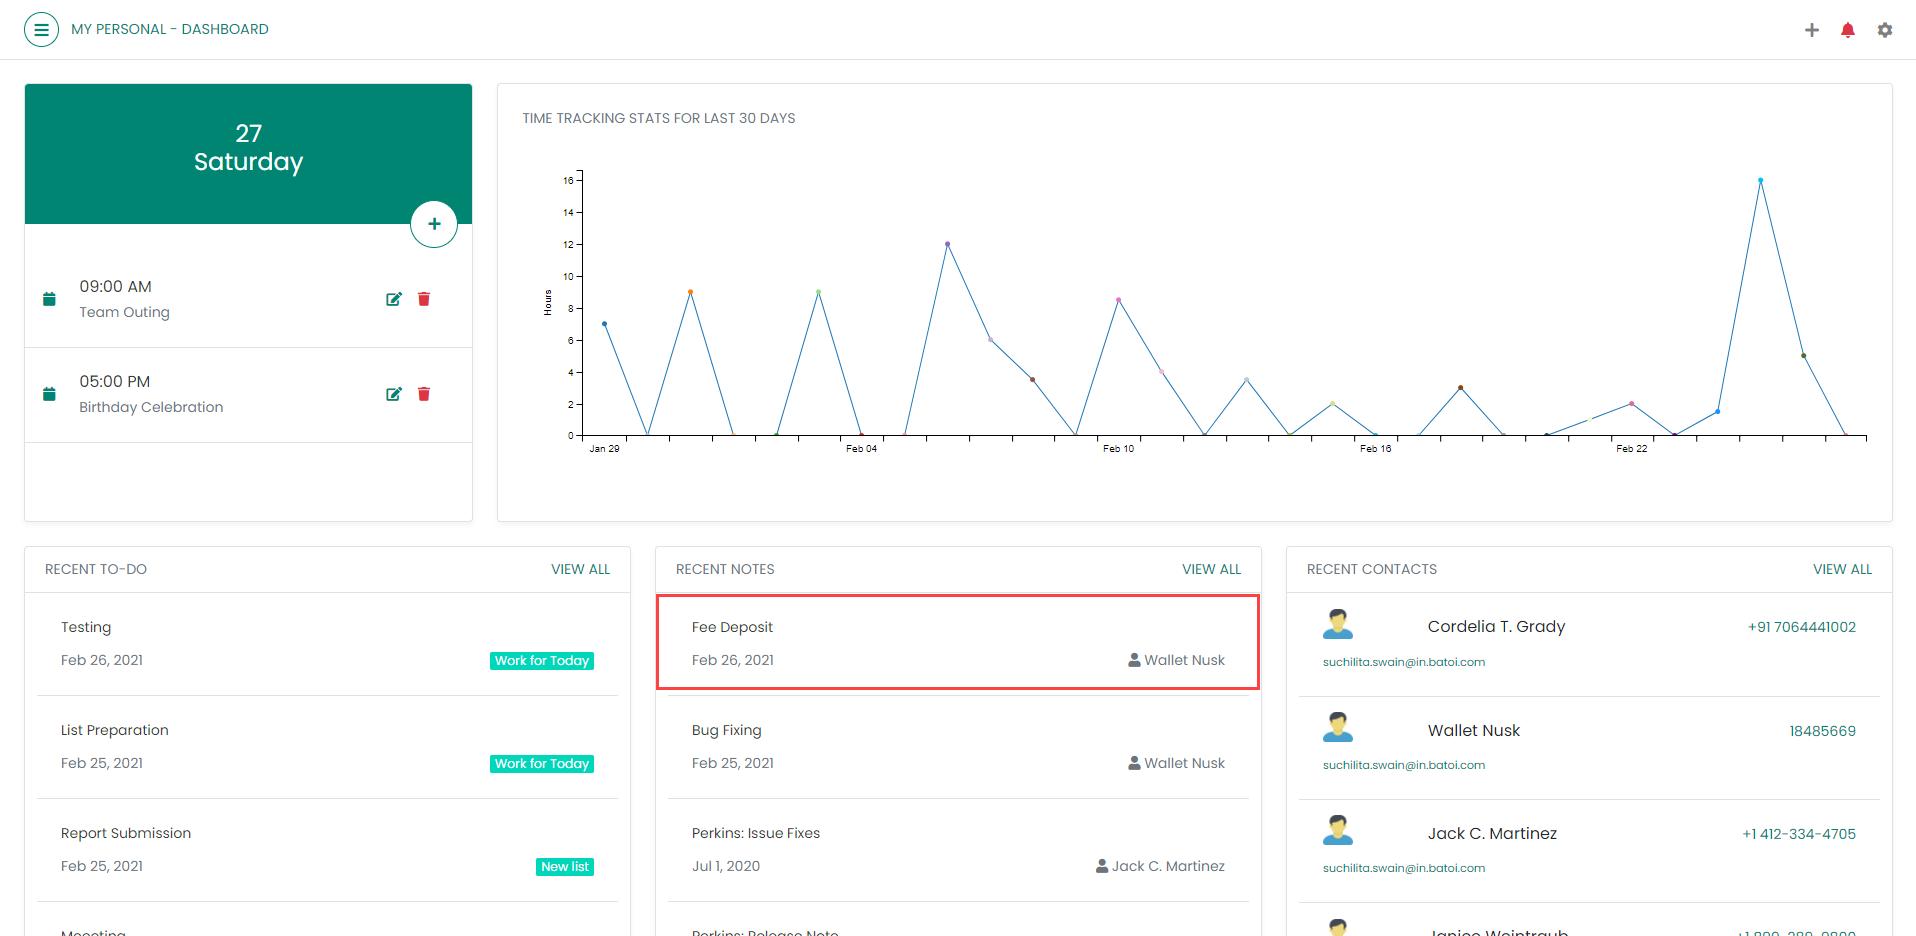
10. To view a particular Note from the Dashboard, click on that Note appearing in the 'Recent Notes' widget as shown in Figure 9. Upon doing so, the view page of that particular Note will appear. Managing a Note has already been discussed in the 'Notes' module.
Figure 9
11. To view all the added Notes, click on the 'View All' button appearing in the 'Recent Notes' widget as shown in Figure 10.
Figure 10
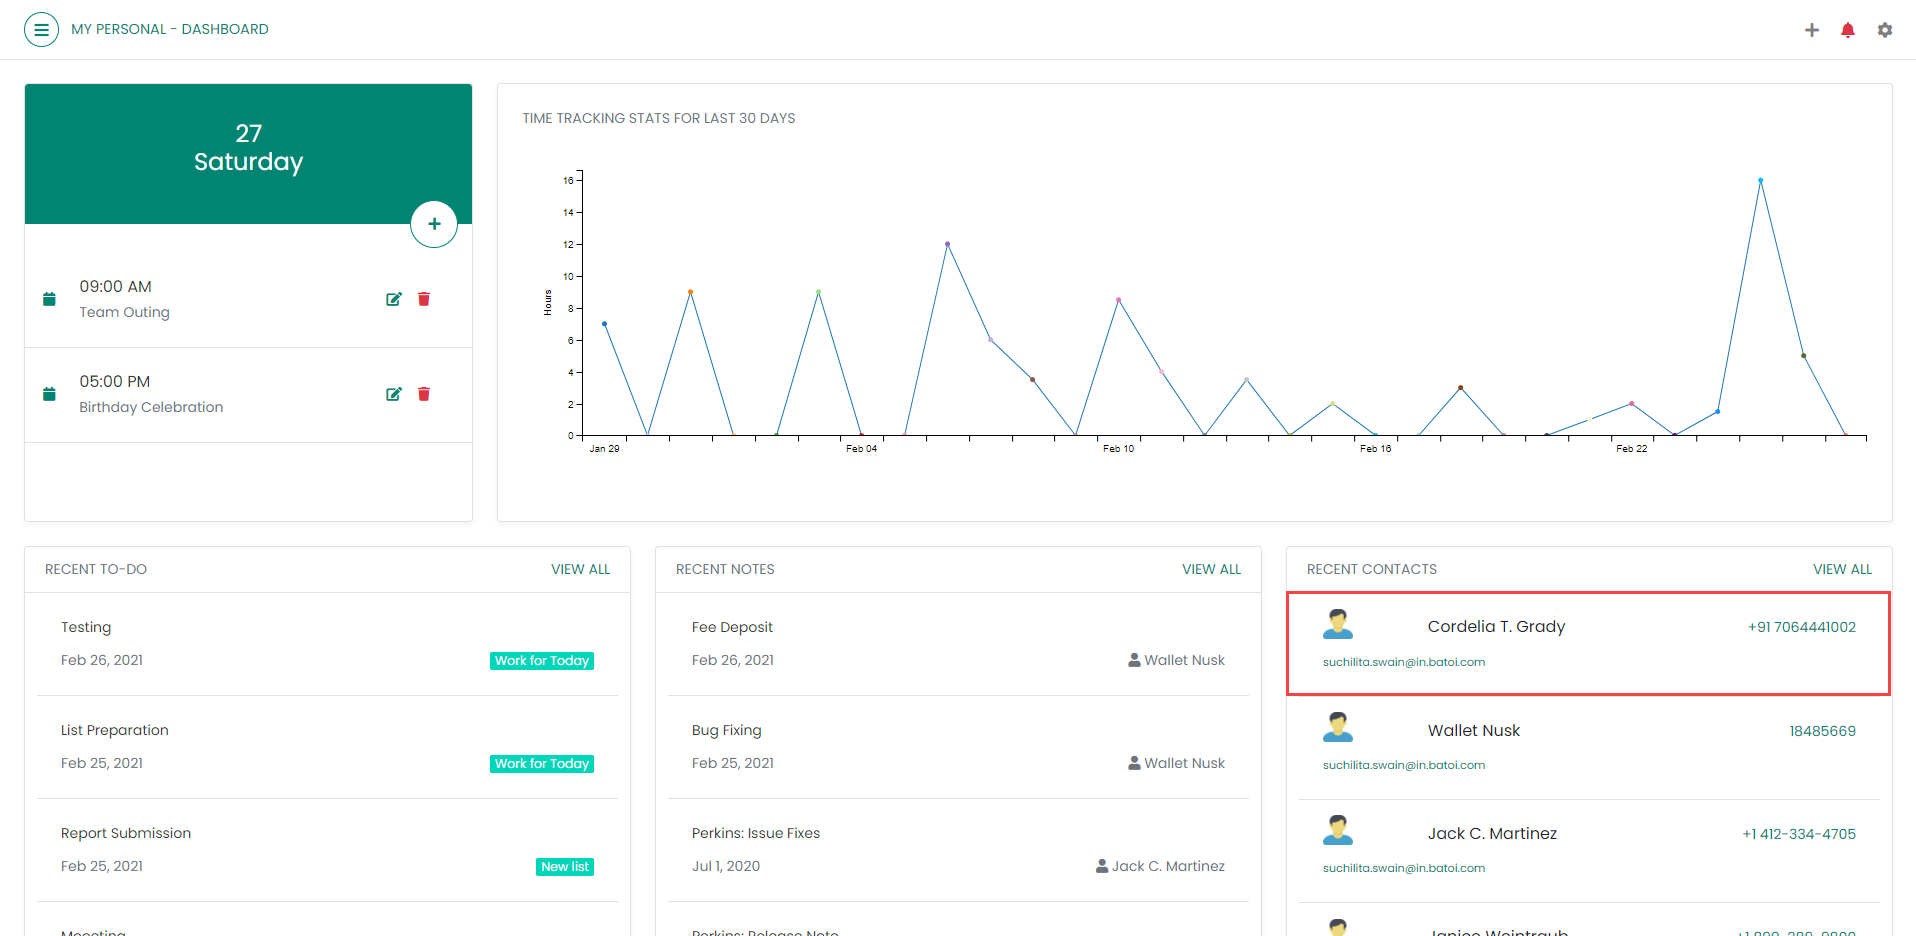
12. To view a particular Contact from the Dashboard, click on that Contact appearing in the 'Recent Contacts' widget as shown in Figure 11. Upon doing so, the view page of that particular Contact will appear. Managing a Contact has already been discussed in the 'Contacts' module.
Figure 11
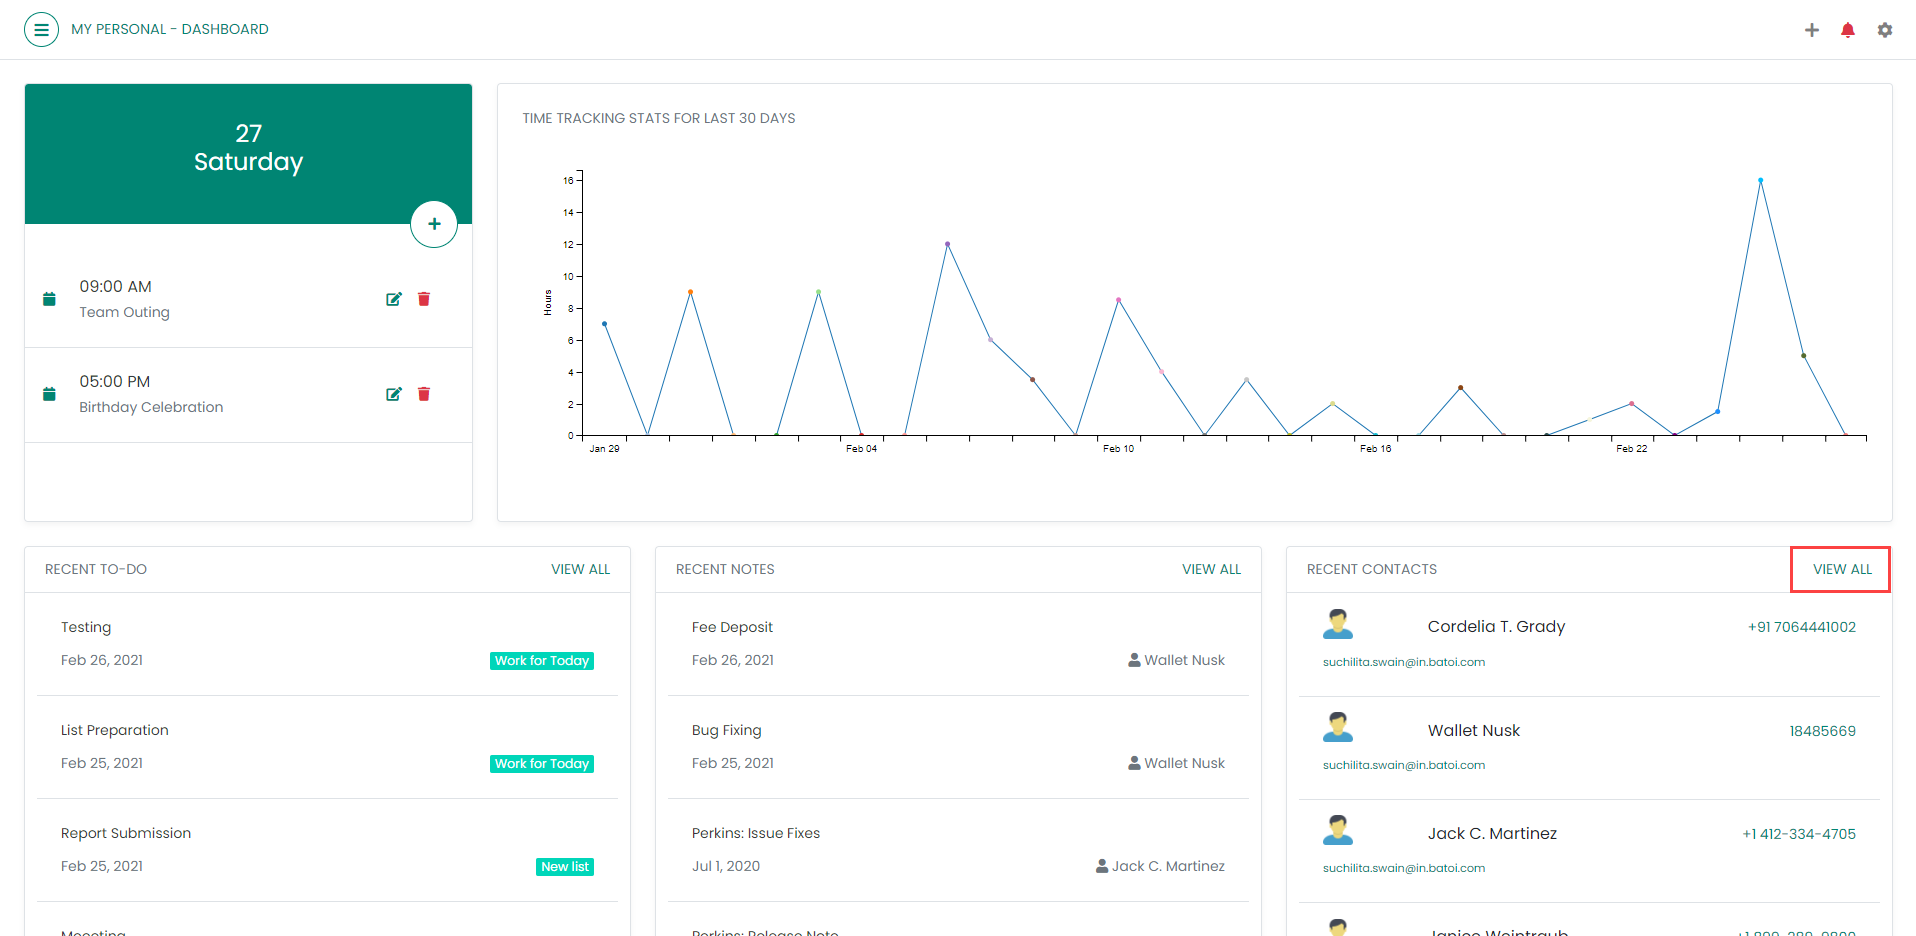
13. To view all the added Contacts, click on the 'View All' button appearing in the 'Recent Contacts' widget as shown in Figure 12.
Figure 12
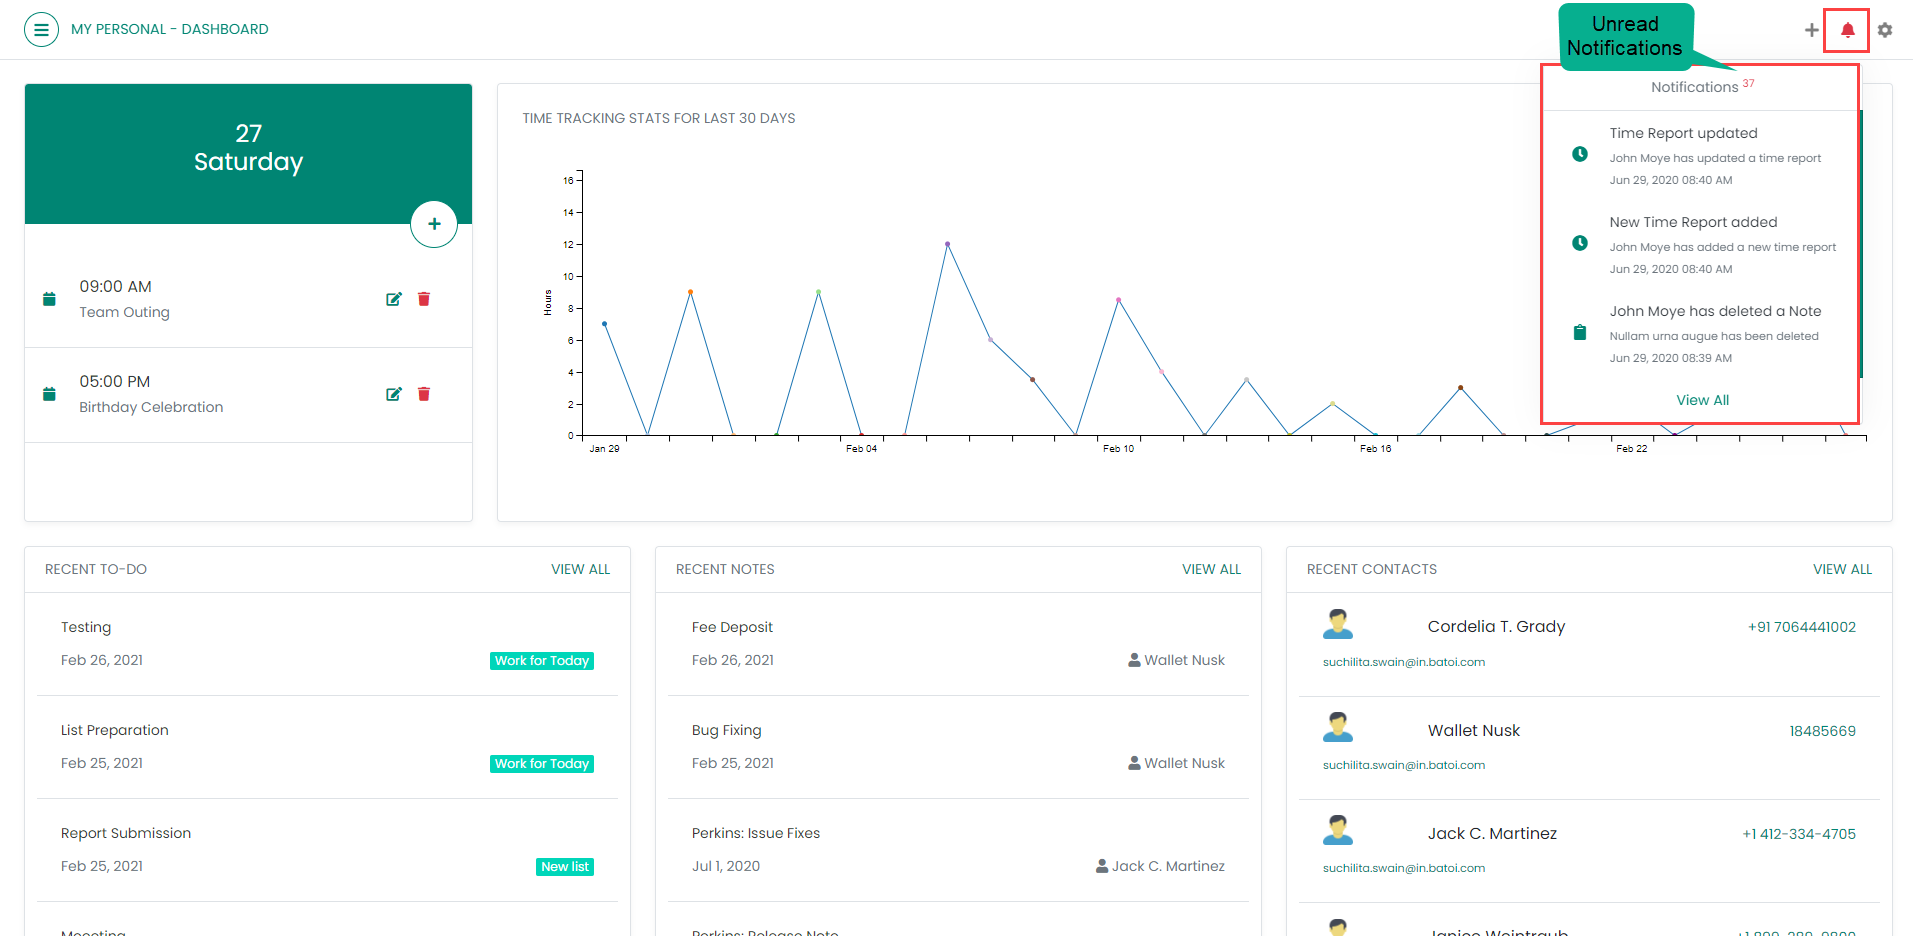
14. To view all the Notifications, click on the ‘Notification’ button present in the menu bar as shown in Figure 13. The notification icon will turn red after receiving notifications and it will appear gray when there is no unread notification.
Figure 13
15. Upon doing so, the ‘Notifications’ widget will appear showing the unread notifications as shown in Figure 14.
Figure 14
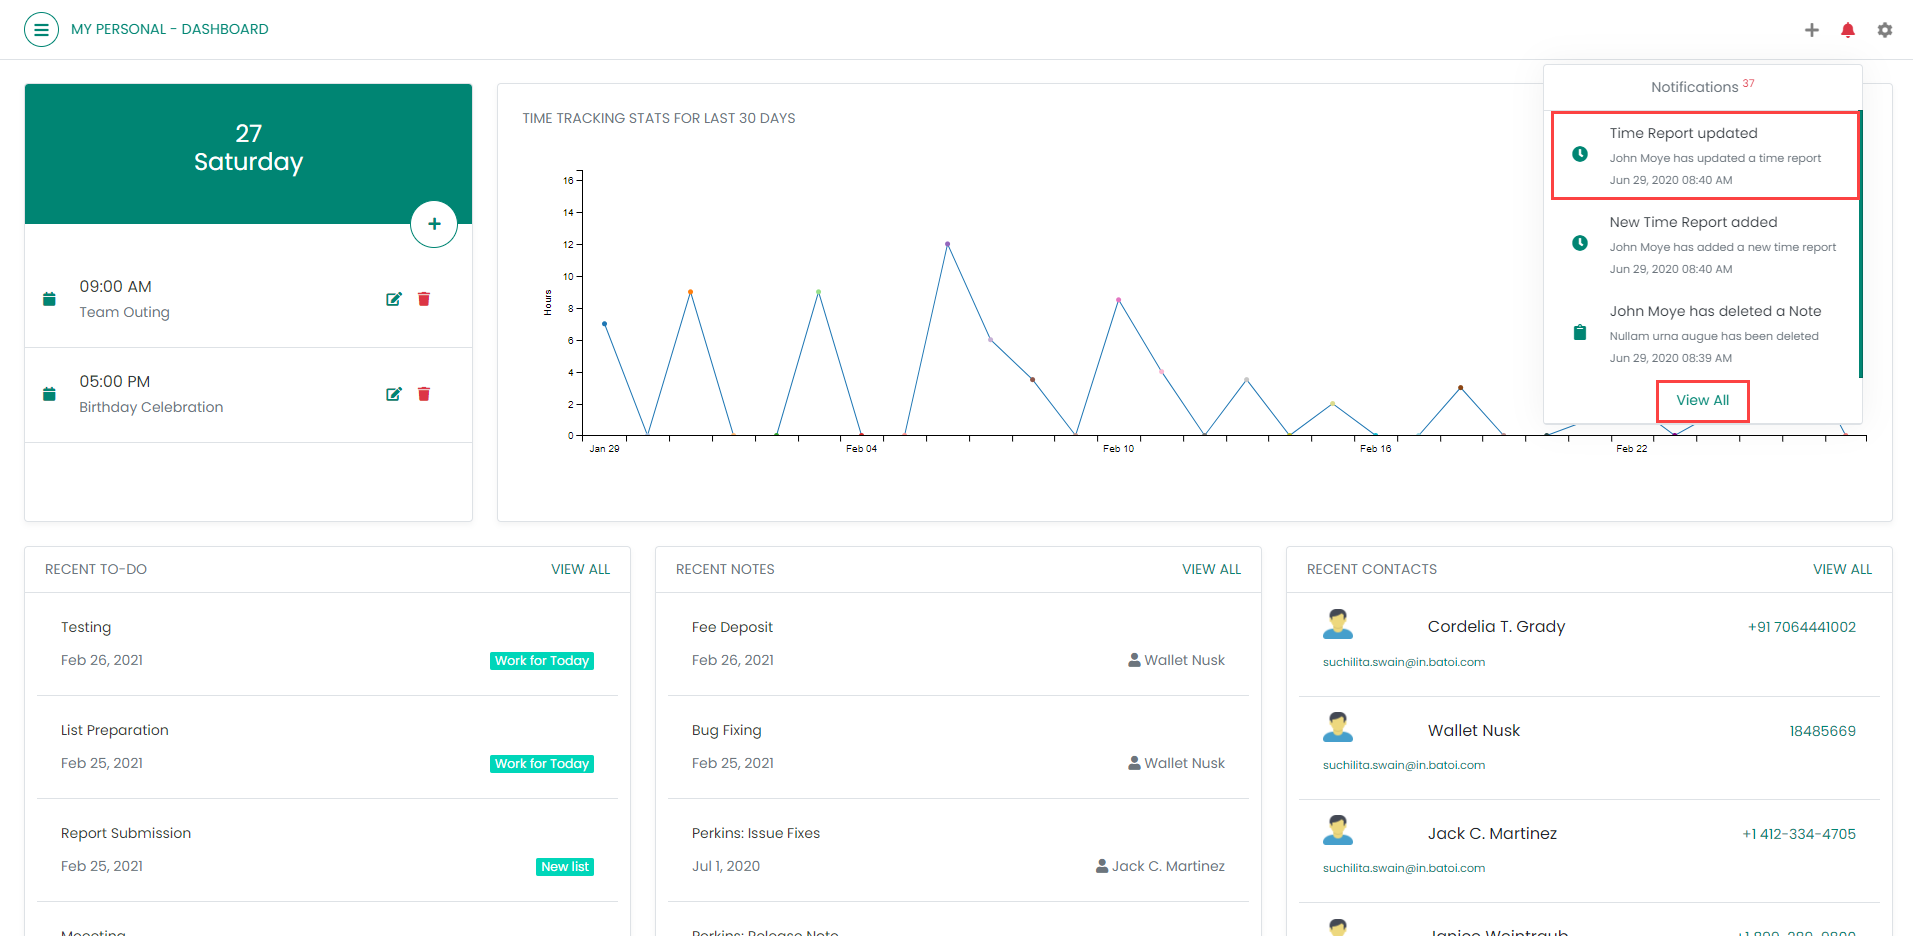
16. To view a Notification from the 'Notifications' widget, click on the said Notification. To view all the Notifications, click on the 'View All' button as shown in Figure 15.
Figure 15
For a specific Team, the notifications for an item will not be received to the user if 'None' permission is given to that user for that specific item (To-Do/Notes/Contact/Calendar Events/Invoices/Time Report).
17. After clicking on the 'View All' button, the Notifications page will appear as shown in Figure 16. Each step shown in Figure 16 is explained in the below table.
Figure 16
Sl. No.
Name
Description
1
Filter Notification
Click to filter notifications
2
Mark As Read
Click to mark the selected notifications as read
3
Select All
Click on the checkbox to select all the notifications
4
Select Single Notification
Click to select single notification appearing against each notification
5
Item Icon
The icon of the item for which the notification is appearing
6
Date & Time
The date on which and the time at which the item is added
7
Notification Details
The details of the notification
8
View Notification
Click to view the notification
9
Mark As Read
Click to mark single notification as read which is appearing against each notification
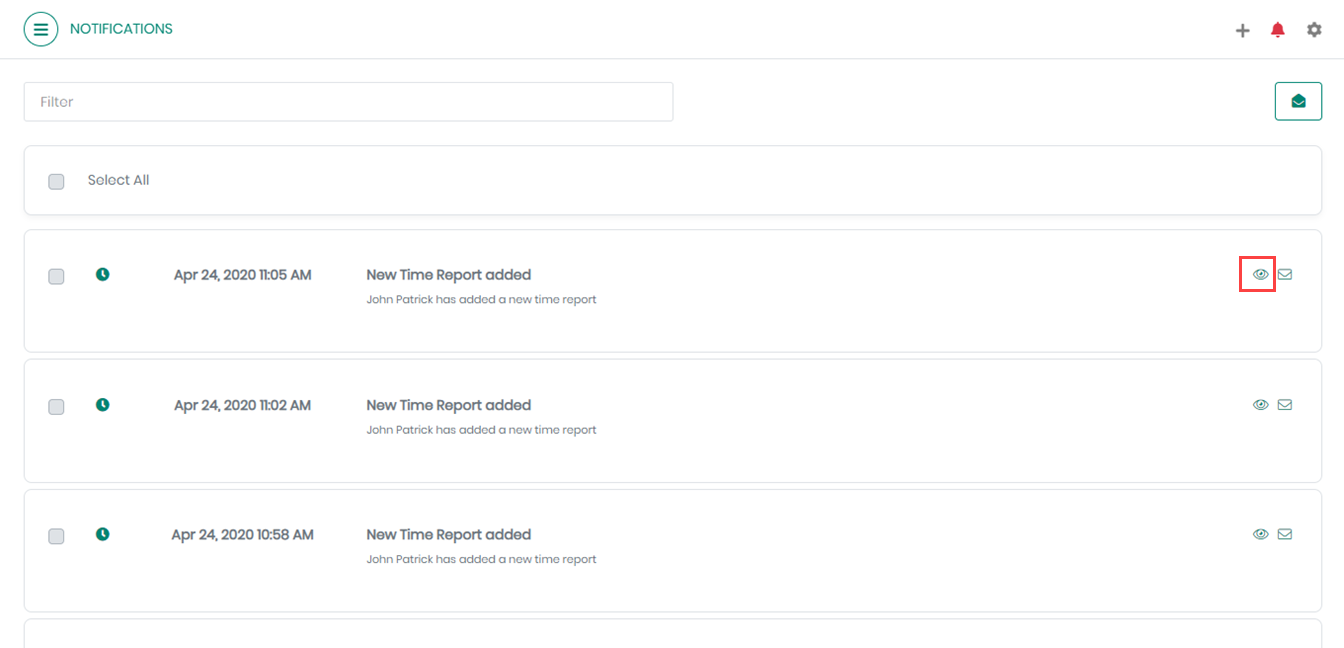
18. To view a Notification, click on the 'View Notification' button appearing against each notification as shown in Figure 17.
Figure 17
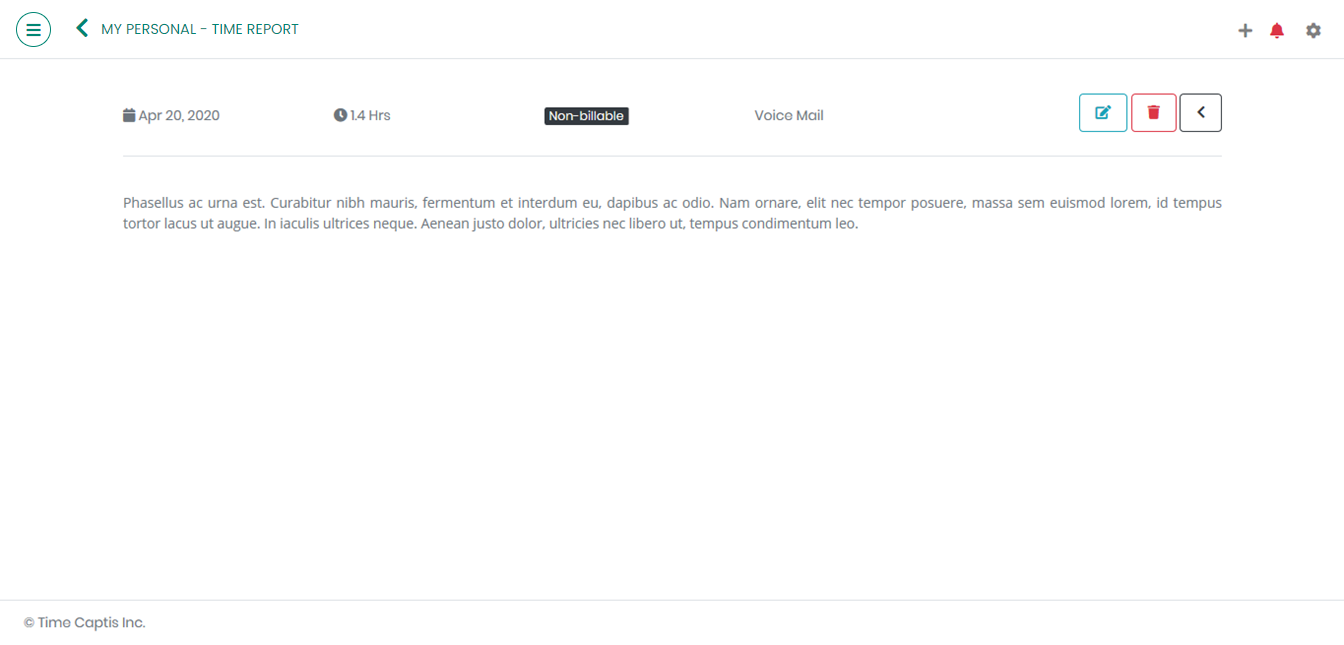
19. Upon doing so, the Notification will appear as shown in Figure 18.
Figure 18
For a specific Team, the 'Edit' button in the view Notification page of any item will only appear if 'View/Edit' permission is given to the user for that item (To-Do/Notes/Contact/Calendar Events/Invoices/Time Report).
For a specific Team, the 'Delete' button in the view Notification page will not be available to any of the Team users except the Admin of that Team.
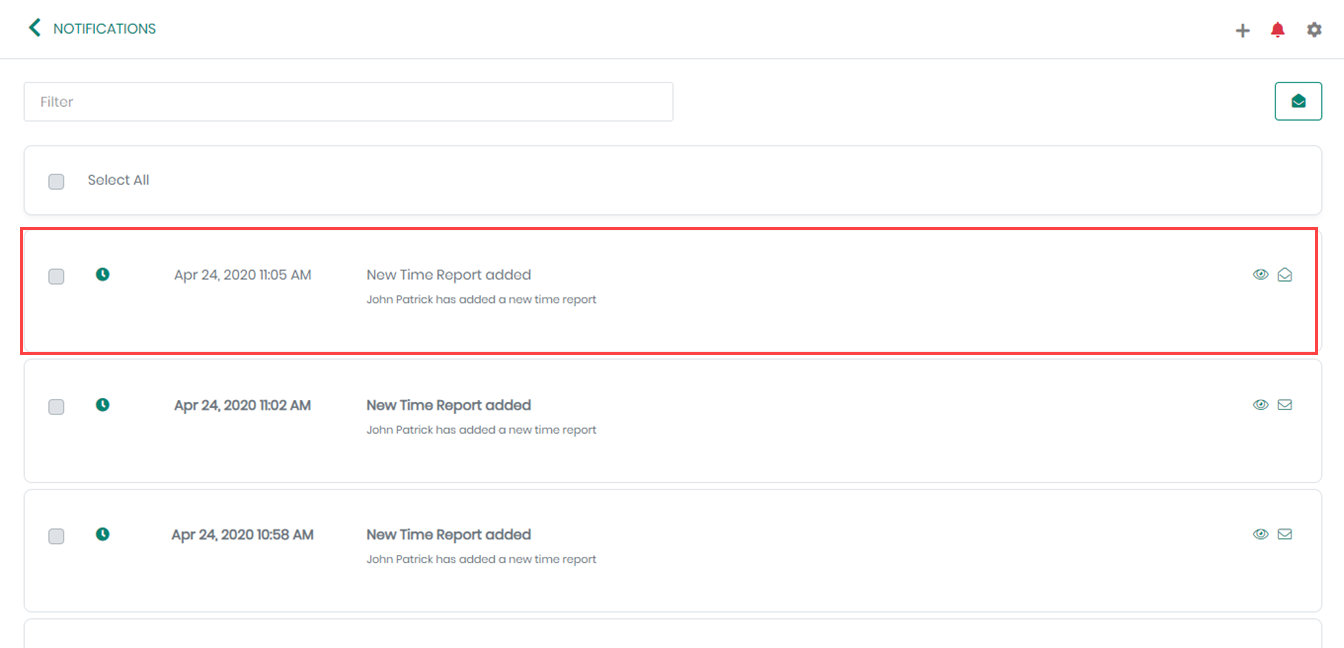
20. After viewing a notification the particular notification will appear as shown in Figure 19.
Figure 19
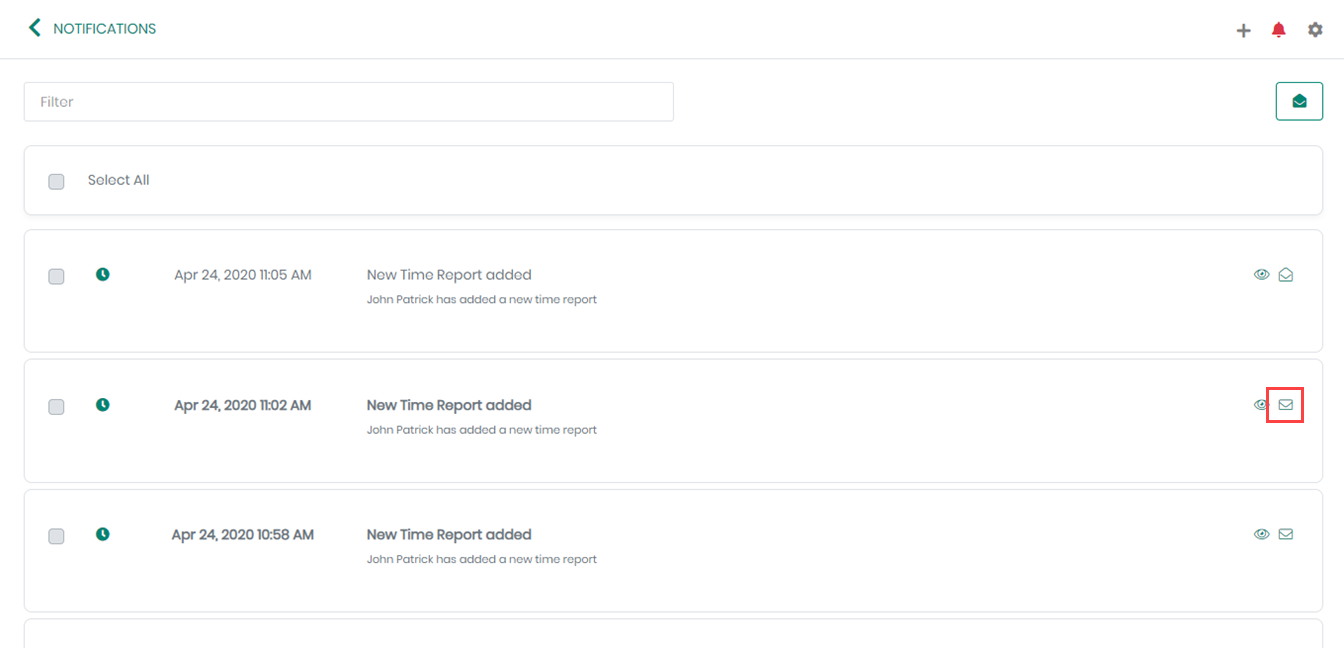
21. To mark an unread notification as read, click on the 'Mark As Read' button appearing against each notification as shown in Figure 20.
Figure 20
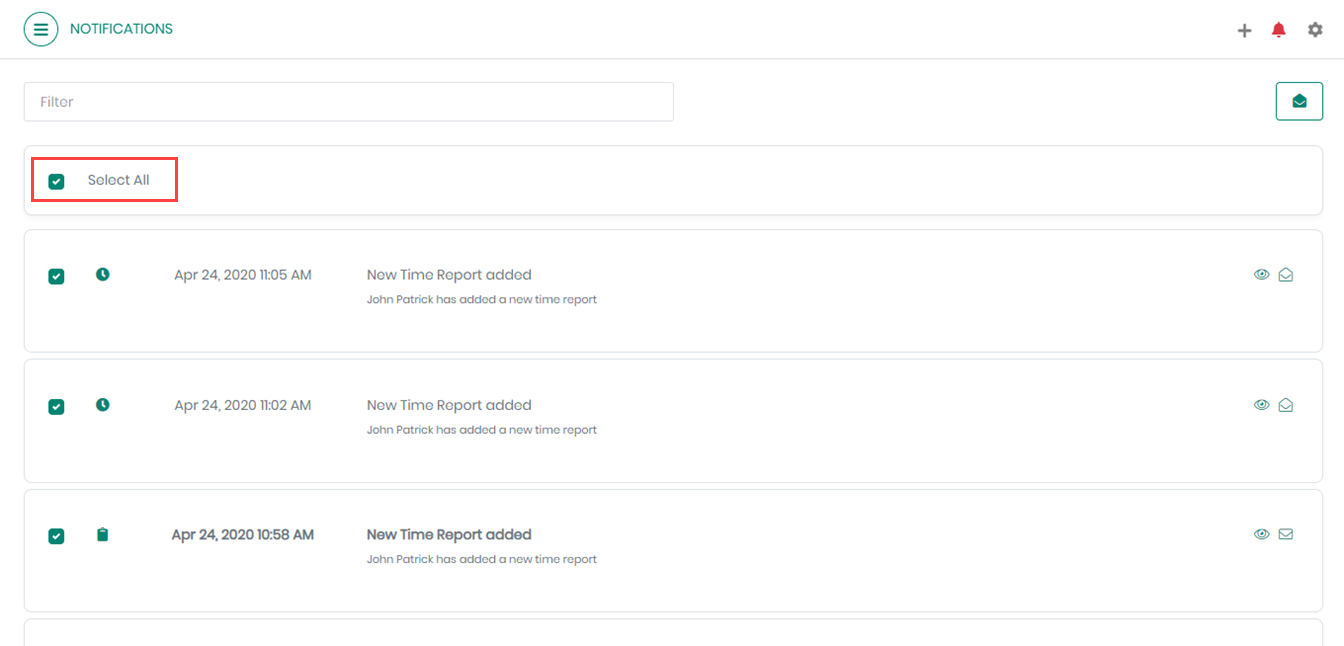
22. To select all the notifications appearing in the 'Notifications' page, enable the 'Select All' checkbox as shown in Figure 21.
Figure 21
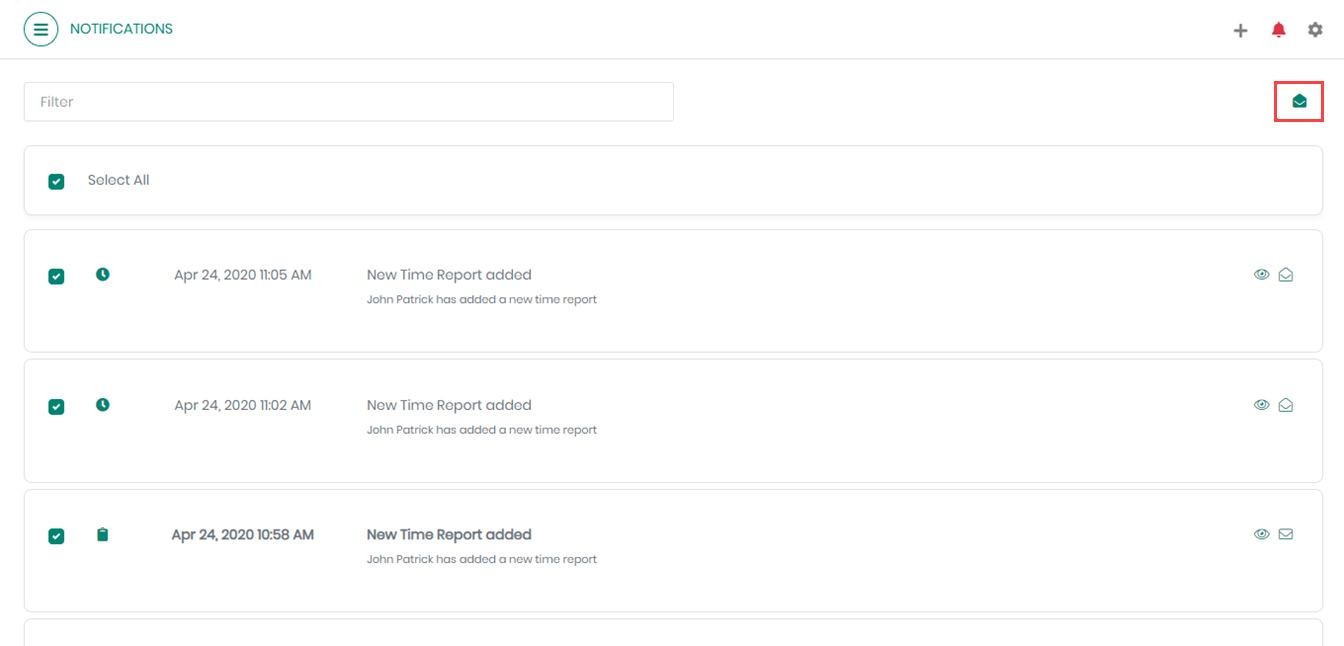
23. To mark the selected notifications as read, click on the 'Mark As Read' button as shown in Figure 22.
Figure 22
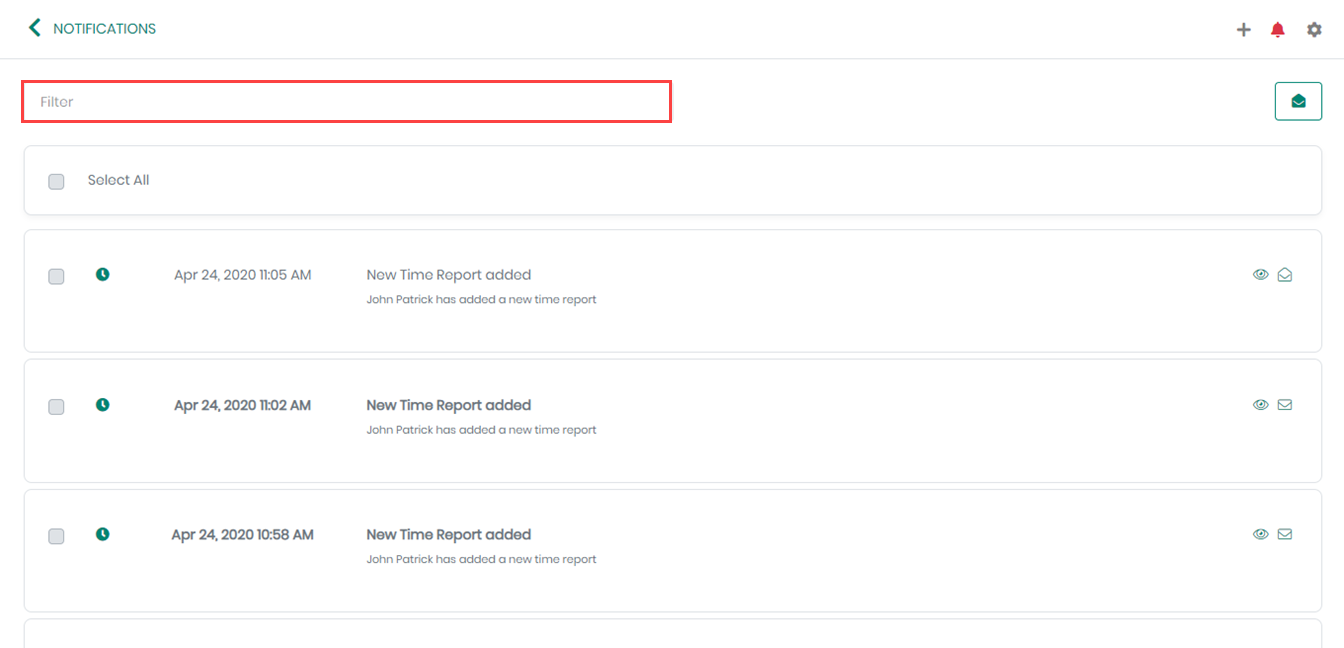
24. To Filter Notification(s), click on the 'Filter ' Text box as shown in Figure 23.
Figure 23
25. Upon doing so, the Notifications page will display the fields for filtering as shown in Figure 24. Each step shown in Figure 24 is explained in the below table.
Figure 24
Sl. No.
Name
Description
1
Title
Enter any item name to be filtered
2
Toggle Up
Click to hide all the filter fields
3
Share
Filter notifications by choosing a team from the drop-down menu
4
Select Notification Type
Filter notifications by choosing a notification type from the drop-down menu
5
From
Filter notifications by entering a start date
6
To
Filter notifications by entering a target date
7
Search
Click to see the filtered result
8
Reset
Click to clear all the search parameters
Manage and track time. Loved by thousands of people worldwide. Trusted by many businesses.
Discover how TimeCaptis accelerates gig work management - from streamlined task management to mobile accessibility, and read real success stories. Perfect for freelancers and independent professionals looking to enhance productivity and client relations in the gig economy. Try TimeCaptis today!
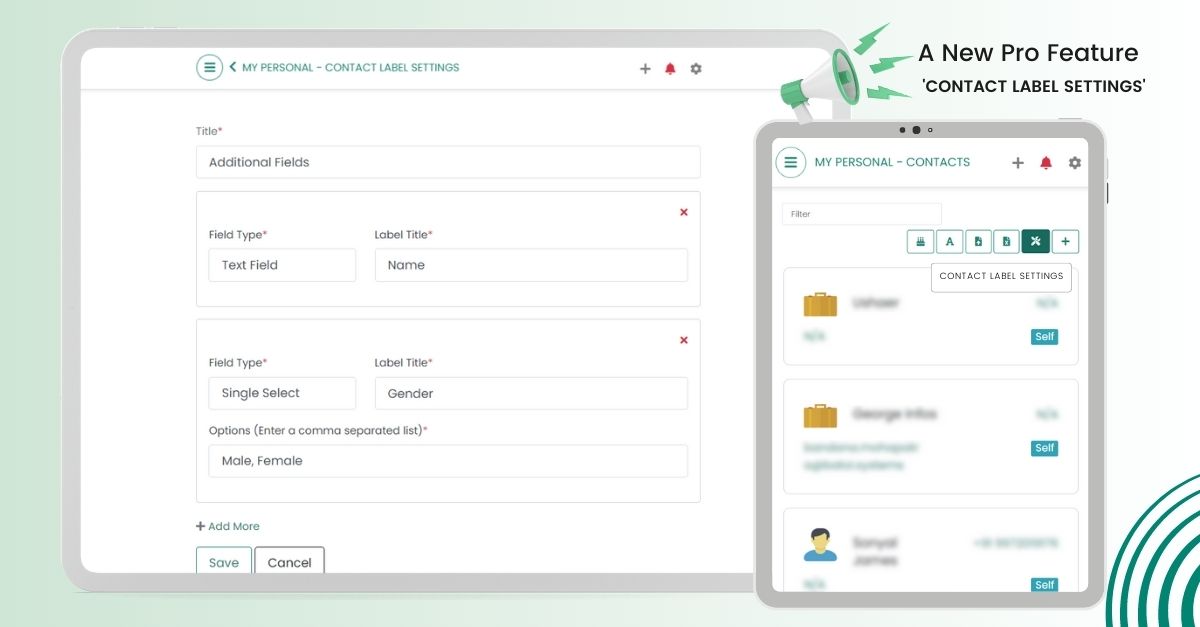
In this blog post, we will explore how custom fields in TimeCaptis can revolutionize your contact management process, enabling you to tailor it to your unique business requirements.
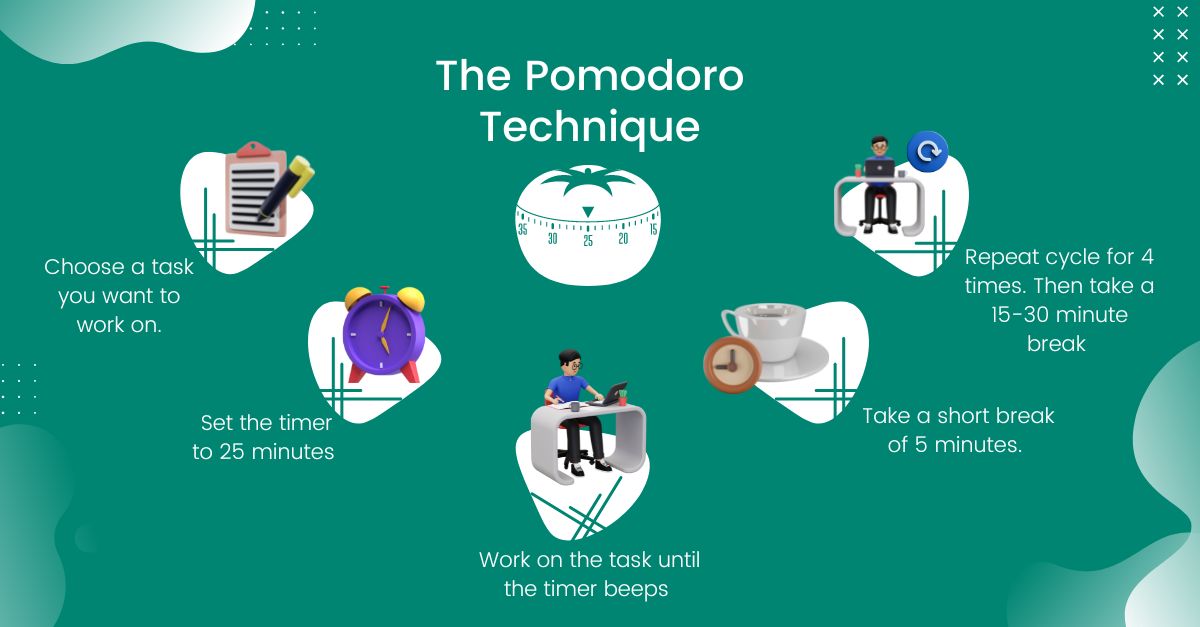
The Pomodoro technique is similar to the time blocking method that tells you to divide your whole workday into smaller blocks separated by small breaks.